The right lighting can shift a bedroom from functional to sanctuary. Most builders install one ceiling fixture and call it done, but that harsh overhead glare doesn’t set anyone up for rest. Mood lighting lets homeowners control brightness, color temperature, and placement to suit the moment: winding down with a book, getting dressed, or just creating a space that feels calmer after a long day. This guide walks through the best mood lighting options for bedrooms in 2026, from smart LED strips to dimmable lamps, plus practical tips on installation, positioning, and choosing the right color temperature for relaxation.
Table of Contents
ToggleKey Takeaways
- Best mood lighting for bedroom relies on layering task, ambient, and accent light on separate dimmers rather than relying on a single harsh overhead fixture.
- Smart LED strip lights and dimmable table lamps are the most versatile DIY-friendly options, requiring no hardwiring and offering full control over brightness and color temperature.
- Warm color temperatures between 2200K–3000K support natural melatonin production and sleep quality, while cool white light above 4000K suppresses melatonin and should be avoided before bed.
- Indirect lighting positioned to bounce off walls and ceilings reduces eye strain and harsh shadows better than direct overhead fixtures.
- Quality smart bulbs with smooth dimming down to 1–5% brightness and CRI above 90 are worth the investment for natural-looking light and better nighttime visibility.
- Effective positioning of mood lighting—placing lamps at shoulder height, mounting LED strips 6–12 inches behind furniture, and using ceiling cove lighting—creates ambiance while preventing glare and maintaining comfort.
Why Mood Lighting Matters for Your Bedroom
Standard overhead lighting, typically a single ceiling fixture with a 60W-equivalent bulb, delivers about 800 lumens of cool white light. That’s fine for visibility, but it’s biologically all wrong for evening hours. Research on circadian rhythms shows that exposure to bright, cool-toned light (above 4000K) before bed suppresses melatonin production, making it harder to fall asleep.
Mood lighting solves this by layering task, ambient, and accent lighting on separate circuits or dimmers. Instead of one switch controlling everything, homeowners gain flexibility: bright light for folding laundry, soft glow for reading, near-dark for sleep. This layered approach also hides architectural flaws, dark corners, low ceilings, awkward angles, by directing light where it’s wanted.
From a practical standpoint, mood lighting increases home value. Buyers notice upgraded electrical work, especially smart-home integration and dimmer switches. A bedroom with thoughtful lighting feels finished: one with a single ceiling fixture feels like a rental.
Mood lighting also reduces eye strain. Direct overhead fixtures create harsh shadows and glare off screens or glossy surfaces. Indirect lighting, bounced off walls or ceilings, diffuses more evenly, which is easier on the eyes during evening activities like reading or working on a laptop in bed (not recommended for sleep hygiene, but realistic for many).
Top Types of Mood Lighting for Bedrooms
Choosing the right fixtures depends on existing wiring, budget, and how much control the homeowner wants. Here are the two most versatile and DIY-friendly options.
Smart LED Strip Lights
Smart LED strips are the workhorse of modern mood lighting. A typical 16.4-foot roll (5 meters) draws 12–24 watts, outputs 1000–1500 lumens, and includes an adhesive backing for mounting under bed frames, behind headboards, along crown molding, or inside closets. Most systems connect via Wi-Fi or Zigbee/Z-Wave hubs and pair with voice assistants like Alexa or Google Home.
Key advantages:
- RGB + tunable white: Users can dial in any color (for accent or entertainment) or adjust white from warm 2700K (candlelight tone) to cool 6500K (daylight). The ability to shift color temperature throughout the evening supports natural melatonin cycles.
- No hardwiring required: Strips plug into a standard 120V outlet via a power adapter. Installation takes about 20 minutes with basic tools, tape measure, scissors (most strips have cut lines every few inches), isopropyl alcohol for surface prep.
- Dimming and scheduling: Many smart lighting systems allow users to program gradual dimming at bedtime or sunrise simulation in the morning. Some models sync with circadian rhythms automatically.
Installation tips: Clean the mounting surface with isopropyl alcohol and let it dry fully. Peel the backing and press firmly for 30 seconds per foot. For corners, use 90-degree connectors instead of bending the strip, sharp bends damage the circuitry. Run the power cable along baseboards or inside cable raceways to keep it tidy. If mounting behind a headboard, leave a 1-inch gap from the wall to prevent overheating.
Trade-off: Cheap strips (under $15) often have poor color rendering (CRI below 80), making skin tones look washed out. Mid-range options ($30–$60) with CRI above 90 are worth the extra cost if the lighting will be visible during daily use, not just as hidden accent lighting.
Dimmable Table and Floor Lamps
Dimmable lamps offer the most flexible placement and easiest installation, no tools required. A pair of bedside table lamps with three-way sockets (50/100/150W equivalent LED) or smart bulbs provides adjustable task lighting for reading and ambient glow when dimmed.
Key advantages:
- Plug-and-play: Move them anytime without patching drywall or hiring an electrician.
- Variety of shades and bases: Fabric shades diffuse light softly: metal or glass shades create focused downlight or dramatic shadows. A tall arc floor lamp can provide overhead-style lighting without ceiling wiring, helpful in older homes or rentals where running new electrical isn’t an option.
- Bulb flexibility: Swap in smart LED bulbs (starting around $10 each) to add dimming, color tuning, and app control without replacing the fixture. Look for bulbs rated for enclosed fixtures if the lamp has a solid shade.
Installation and placement: Position table lamps 18–24 inches above the mattress for reading, high enough that light reaches the page without glare in the eyes. If using floor lamps, aim the head toward a wall or ceiling to bounce light indirectly. Avoid placing lamps where cords cross walkways: use flat extension cords under rugs if needed, but ensure they’re rated for 15 amps and check for fraying regularly.
For true dimming (not just on/off), use LED-compatible dimmer switches or smart plugs with dimming features. Standard rotary dimmers designed for incandescent bulbs can cause LED flicker or buzzing. When using different styles of lighting across the room, coordinate color temperature, mixing warm and cool white in the same space can feel jarring.
Color Temperature and Ambiance: Choosing the Right Light
Color temperature, measured in Kelvin (K), determines whether light feels cozy or clinical. Most bedroom lighting should fall between 2200K and 3000K for evening use.
- 2200K–2700K (warm white/amber): Mimics candlelight or incandescent bulbs. Ideal for winding down, this range has minimal blue light, which is linked to alertness. Use for bedside lamps, accent strips, or any fixture used within two hours of bedtime.
- 3000K–3500K (soft white): Slightly brighter and more neutral, but still warm. Good for morning routines or tasks like getting dressed where some color accuracy matters but relaxation is still a priority.
- 4000K+ (cool white/daylight): Too stimulating for most bedroom use. Reserve for closets or dressing areas where color-matching clothing is important.
Tunable white fixtures let users shift temperature on the fly, start the evening at 3000K for reading, then drop to 2200K before sleep. Some systems automate this based on time of day or link to smart home routines.
CRI (Color Rendering Index) also matters. Bulbs with CRI above 90 show true colors, which is useful in bedrooms used for makeup application or selecting outfits. For pure mood lighting, CRI 80 is acceptable and often cheaper.
Layering color and white: Many homeowners use colored RGB strips as accent lighting, behind a headboard or under floating nightstands, while keeping functional lamps at warm white. This separation prevents color wash on faces or bedding while still adding visual interest. When experimenting with an ambient lighting palette, consider how wall color interacts with light, darker walls absorb more, requiring higher lumens or additional fixtures.
Dimming range: Not all dimmers dim equally. Budget LED bulbs often only dim to about 20% brightness before shutting off or flickering. Higher-quality bulbs dim smoothly down to 1–5%, which is important for nighttime visibility without flooding the room. Check product specs for “dim-to-warm” features, where the bulb shifts toward amber tones as it dims, mimicking the behavior of old incandescents and creating a more natural feel.
How to Install and Position Mood Lighting in Your Bedroom
Effective mood lighting relies as much on placement as product choice. Poor positioning creates glare, shadows, or wasted light.
General principles:
- Bounce light when possible: Aim fixtures at walls, ceilings, or the back of furniture instead of directly into the room. Indirect lighting reduces harsh shadows and distributes lumens more evenly.
- Avoid direct sightlines to bulbs: If a bulb is visible from the bed, it’ll cause glare. Use shades, diffusers, or recess fixtures behind furniture edges.
- Layer at different heights: Combine low (under-bed strips), mid (table lamps), and high (wall sconces or ceiling cove lighting) sources to fill the space without relying on one dominant fixture.
Step-by-step for LED strip installation:
- Measure and plan: Sketch the run, under the bed frame, along the headboard, or inside a tray ceiling. Measure twice. Most strips come in fixed lengths: cutting in the wrong spot (outside marked cut lines) ruins the section.
- Clean surfaces: Wipe mounting areas with isopropyl alcohol. Dust or oils prevent adhesive from bonding. Let dry 5 minutes.
- Test before mounting: Plug in the strip and controller, verify all LEDs light up and colors display correctly. Returning a product is easier than peeling off bad adhesive.
- Mount and press firmly: Peel backing in sections, apply the strip, and press down for 30 seconds per foot. For extra hold, add a bead of clear silicone along the strip edge, especially on textured surfaces like wood grain.
- Conceal wiring: Use adhesive cable clips or raceways along baseboards. If running under a bed, secure the power adapter to the frame with zip ties so it doesn’t shift.
- Connect to power and configure: Plug into an outlet (ideally on a smart plug for easy control). Download the manufacturer’s app, pair the device, and set schedules or scenes.
For dimmable lamps:
- Install rotary or slide dimmer switches in the wall if replacing an existing switch (requires basic electrical work, shut off the breaker, confirm wires are dead with a voltage tester, match wire colors). This typically takes 15–20 minutes for someone comfortable with electrical.
- Alternatively, use smart plugs with dimming, no wiring needed. These work with most lamps but add a small box between the outlet and cord.
- Safety note: If installing in-wall dimmers, use junction boxes rated for the switch type. Overloading a circuit (total lamp wattage exceeds 80% of breaker capacity) is a fire risk. Bedrooms are usually on 15-amp circuits (1800W max), so keep total lighting load under 1440W. LED fixtures draw far less than incandescent equivalents, but check labels.
Positioning for specific effects:
- Reading light: Place lamps so the bottom of the shade is at shoulder height when sitting up in bed. Avoids glare while directing light onto pages.
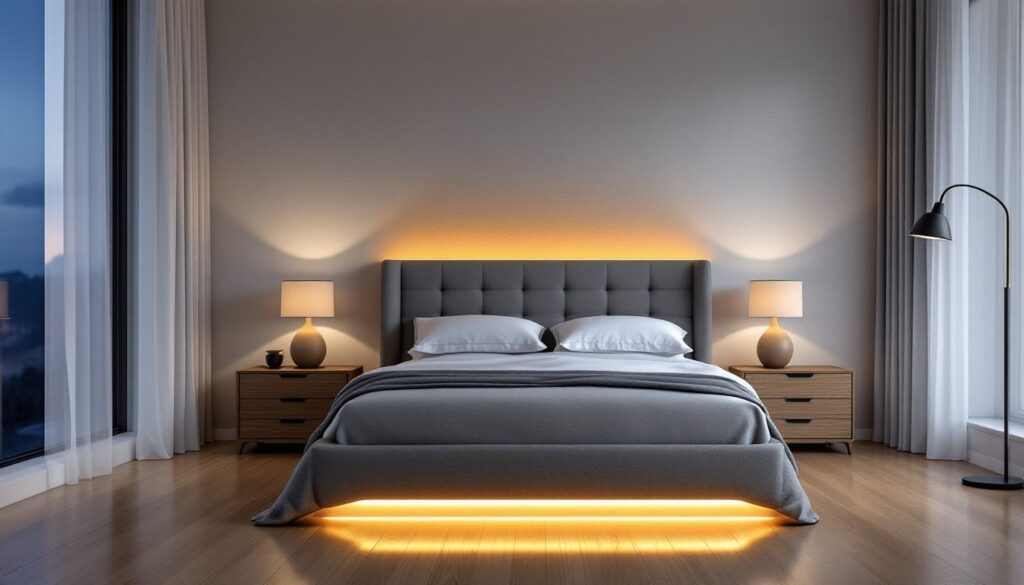
- Accent glow: Mount LED strips 6–12 inches behind furniture (headboard, dresser, nightstand) to create a floating effect. The gap diffuses the light before it hits the wall.
- Under-bed lighting: Install strips along the bed frame’s underside, centered for even glow. Connect to a motion sensor (about $15) for automatic nighttime navigation, saves fumbling for switches.
- Ceiling cove or crown molding: If the bedroom has crown molding with a gap behind it, tuck LED strips into the cavity. This “cove lighting” washes the ceiling with soft, indirect light, no glare, just ambiance. Requires a ladder and some patience threading the strips into place.
Many of the bedroom lighting ideas that gain traction online rely on this indirect approach. For more layered approaches incorporating task and accent light, check out resources on layered lighting techniques.
Permit and code notes: Installing new lighting circuits or adding ceiling fixtures typically requires a permit and should be done by a licensed electrician. Running low-voltage LED strips from a plug-in adapter (Class 2 wiring, under 30V) doesn’t require a permit in most jurisdictions, but always verify local codes. If modifying in-wall wiring, follow NEC (National Electrical Code) standards, especially around junction box fill capacity and wire gauge.
Conclusion
Mood lighting transforms a bedroom from a place to sleep into a space that adapts to needs throughout the day, bright for tasks, soft for relaxation, and dim for rest. Smart LED strips and dimmable lamps offer the most flexibility without major electrical work, and layering fixtures at different heights creates depth that single overhead lights can’t match. Prioritize warm color temperatures (2200K–3000K) for evening use, test all gear before final installation, and take time to position lights where they’ll bounce off surfaces instead of glaring into eyes. The result is a bedroom that feels intentional, comfortable, and a lot easier to unwind in.