Bad bathroom lighting turns every morning into a guessing game. Too dim, and you miss spots while shaving. Too harsh, and you look washed out before you’ve even left the house. Vanity lighting isn’t just about visibility, it’s about getting accurate color rendering for makeup application, grooming tasks, and general bathroom use. This guide walks through fixture types, bulb selection, placement rules, and design choices that deliver functional, flattering light. Whether upgrading an existing bath or planning a new build, the right vanity lighting makes every task easier and every user look better.
Table of Contents
ToggleKey Takeaways
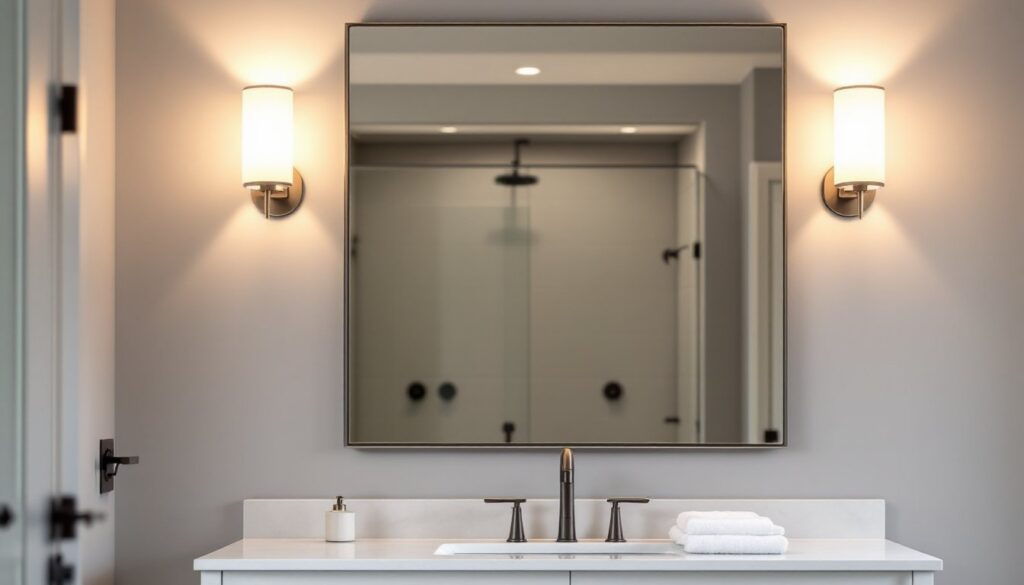
- Wall-mounted sconces on both sides of the mirror provide the most flattering bathroom vanity lighting by eliminating shadows across the face and are the preferred choice over single overhead fixtures.
- Proper vanity lighting requires 50-75 footcandles at the mirror surface with bulbs rated at 3500K color temperature and CRI 90+ for accurate color rendering during grooming and makeup application.
- Install sconces at 60-65 inches from the finished floor, spaced 36-40 inches apart for single-sink vanities, and ensure fixtures mount to solid framing rather than drywall alone.
- LED bulbs deliver superior performance for bathroom vanity use, lasting 15,000-25,000 hours with minimal heat output and superior color accuracy compared to halogen alternatives.
- Bathroom lighting fixtures within 8 feet of tubs or showers require UL listing for damp or wet locations under code, making professional installation advisable for safety and compliance.
Why Bathroom Vanity Lighting Matters
Vanity lighting serves two distinct functions: task illumination and facial visibility. Unlike overhead fixtures that cast shadows under the eyes, nose, and chin, proper vanity lighting eliminates those shadows by directing light at the face from multiple angles.
Task lighting requirements depend on what happens at the vanity. Shaving, makeup application, contact lens insertion, and skincare routines all demand high-lumen output with minimal glare. The Illuminating Engineering Society recommends 50-75 footcandles at the mirror surface for grooming tasks, roughly equivalent to 4,000-6,000 lumens in a standard 5×8-foot bathroom.
Poor vanity lighting creates practical problems. Shadows make it hard to see blemishes, uneven foundation, or missed whiskers. Color distortion from low-CRI bulbs makes it impossible to judge whether clothes match or makeup looks natural in daylight. And fixtures placed too high or too far from the mirror waste light while creating unflattering shadows.
Good vanity lighting also affects resale value. According to data from home improvement professionals, updated bathroom lighting consistently ranks among the top five cosmetic upgrades that appeal to buyers. It’s a visible improvement that signals the space has been maintained and modernized.
Types of Vanity Lighting Fixtures
Sconces and Wall-Mounted Lights
Wall sconces mounted on both sides of the mirror provide the most flattering illumination. This configuration directs light horizontally across the face, filling in shadows without creating the harsh overhead glare common in older bathrooms.
Sconces should be installed 60-65 inches from the floor to center height, though this varies based on user height and mirror size. Space them 36-40 inches apart for single-sink vanities. For double vanities, place one sconce on each outer edge of each mirror, plus additional fixtures between sinks if mirrors are separated.
Single-bulb sconces work for powder rooms or small vanities. Multi-bulb fixtures (2-4 bulbs per sconce) provide enough output for larger spaces. Look for fixtures with opal glass or fabric shades that diffuse light rather than exposed bulbs, which create glare and hot spots.
Vertical sconces offer a sleek, space-saving profile. Horizontal or candelabra-style sconces provide more spread but require more wall clearance. Consider door swing, towel bar placement, and wall stud locations before settling on a style, vanity lights need solid backing for safe installation.
Overhead and Bar Lights
Bar lights (also called bath bars or vanity strips) mount above the mirror and distribute light across the vanity countertop. They’re the default choice in many builder-grade bathrooms because they’re simple to install and require only one junction box.
Bar lights work best when paired with side lighting or when the mirror extends high enough that the fixture can be mounted close to the glass. A bar light mounted 6-12 inches above the mirror casts light downward onto the face with less shadowing than a centered ceiling fixture.
Length matters. The fixture should span 75% of the mirror width or at least 24 inches for adequate coverage. A 3-bulb bar light works for mirrors up to 36 inches wide: 4-bulb fixtures handle 48-inch mirrors.
Overhead-only lighting is the least flattering option but sometimes necessary in tight spaces. If you’re stuck with a single overhead fixture, choose one with multiple bulbs aimed in different directions or a large diffuser that softens the light. Avoid recessed cans directly over the vanity, they create deep shadows under the brow, nose, and chin.
Designers who specialize in rustic bathroom lighting often combine overhead pendants with sconces to balance ambient and task light. That layered approach works across most design styles.
Choosing the Right Bulbs and Color Temperature
Color temperature measures the hue of light in Kelvin (K). Bathrooms need 3000K-4000K for accurate color rendering, warm enough to feel inviting but neutral enough to show true skin tones and makeup colors.
2700K bulbs (soft white) skew too yellow for grooming tasks. They’re fine for ambient lighting in bedrooms but make it hard to judge makeup or clothing color in the bathroom. 5000K+ bulbs (daylight) feel clinical and cast a blue-white light that most users find harsh and unflattering.
The sweet spot is 3500K, labeled “bright white” or “neutral white” on most bulb packaging. This temperature mimics natural daylight without the cold cast of true daylight bulbs.
CRI (Color Rendering Index) matters as much as color temperature. CRI measures how accurately a light source reveals colors compared to natural sunlight. For vanity lighting, aim for CRI 90+. Bulbs with CRI below 80 distort reds, greens, and skin tones, making it nearly impossible to apply makeup or judge whether you’ve got a rash or just bad lighting.
LED bulbs are the current standard. They last 15,000-25,000 hours, produce minimal heat, and work with dimmers when labeled as dimmable. Avoid cheap LED bulbs with low CRI, they flicker, shift color as they dim, and fail early. Quality LEDs from Philips, GE, or Cree cost $3-8 per bulb but deliver consistent light for years.
Wattage equivalents can confuse buyers used to incandescent standards. A 60-watt incandescent produces about 800 lumens. The LED equivalent uses 8-10 watts but delivers the same lumens. For vanity lighting, plan on 1,500-2,000 lumens per sink, split across sconces, bars, or overhead fixtures.
Halogen bulbs remain popular for their excellent CRI and instant-on capability, but they run hot and burn out faster than LEDs. If using halogen, ensure fixtures are rated for the heat output and keep bulbs away from shower spray and steam.
Explore more about design-specific lighting choices when coordinating bulb selection with overall bath aesthetics.
Proper Placement and Installation Height
Sconce height should place the center of the bulb at 60-65 inches from the floor. This aligns light with the face for most adults standing at the vanity. If household members are unusually tall or short, adjust up or down by 2-3 inches.
Measure from the finished floor, not the subfloor. If installing sconces during a renovation, account for new tile, vinyl, or floor thickness. Getting the height wrong by even 4 inches changes how shadows fall.
Spacing between sconces should be 36-40 inches on center for single-user vanities. For double vanities with two sinks, place sconces flanking each mirror or centered over each sink if using overhead bars. Avoid placing a single fixture between two sinks, it lights the middle of the counter but leaves both faces in shadow.
Overhead bar lights install 75-80 inches from the floor, or about 6-12 inches above the top of the mirror. If the mirror extends too close to the ceiling, mount the bar directly to the mirror’s upper edge or recess it into a soffit. Bars mounted higher than 84 inches lose effectiveness.
Electrical box placement must match fixture requirements. Most sconces use standard round or octagon boxes rated for 50 pounds if they’re lightweight, or fan-rated boxes for heavier glass fixtures. Bar lights over 10 pounds need two mounting points or a fan-rated box. Always verify the box is screwed to solid framing, drywall anchors aren’t sufficient for permanent lighting.
Code requires bathroom lights (within 8 feet of a tub or shower) to be UL listed for damp or wet locations, depending on proximity to water. Fixtures directly over a tub need wet ratings. Vanity lights outside the tub/shower zone typically need damp ratings. Check local code, some jurisdictions require GFCI protection on all bathroom lighting circuits.
If the existing electrical box isn’t in the right spot, running new wire typically requires opening the wall. That’s a good time to add blocking between studs for solid sconce backing. Don’t try to mount fixtures to drywall alone, they’ll sag or pull free within months.
Installation details and fixture placement are thoroughly covered in guides on bathroom lighting updates.
DIY installation is straightforward if you’re comfortable with basic electrical work: turn off power at the breaker, verify it’s off with a non-contact tester, connect black to black (hot), white to white (neutral), and ground wires to the box. Use wire nuts rated for the gauge and number of wires. Mount the fixture, install bulbs, restore power, and test.
If the existing wiring is cloth-wrapped, aluminum, or shows any corrosion, call a licensed electrician. Don’t guess at wire gauge or attempt to splice incompatible wire types.
Style and Design Considerations
Vanity lighting style should align with the rest of the bathroom’s design language. Mismatched fixtures look like an afterthought, while cohesive lighting ties the space together.
Modern and contemporary bathrooms favor clean lines, geometric shapes, and metal finishes like brushed nickel, matte black, or polished chrome. LED strip lights integrated into mirrors or floating vanities provide sleek, minimalist illumination. Bar lights with exposed Edison bulbs work in industrial-modern spaces but may need diffusers to reduce glare.
Traditional and transitional styles lean toward sconces with fabric shades, opal glass globes, or frosted cylinder shades. Oil-rubbed bronze, aged brass, and brushed gold finishes add warmth. Fixtures with decorative backplates and vintage-style filament bulbs bridge classic and modern aesthetics. Fans of period styles often incorporate mid-century bathroom lighting with globe sconces and geometric shapes.
Farmhouse and rustic designs use fixtures with wood accents, cage-style shades, or lantern-inspired profiles. Matte black or galvanized metal finishes complement shiplap, beadboard, and natural wood vanities. Keep proportions in check, oversized farmhouse sconces overwhelm small powder rooms.
Finish matching used to be a hard rule: all metal finishes (faucets, towel bars, lighting) had to match exactly. Current design trends embrace mixed metals as long as they share a similar tone (warm metals together, cool metals together). Mixing brushed nickel sconces with a matte black faucet works: pairing polished brass with chrome usually doesn’t.
Fixture size should be proportional to the vanity and mirror. A single 5-inch sconce looks lost next to a 48-inch double vanity. Conversely, oversized 12-inch sconces crowd a small powder room. As a rule, sconces should be one-quarter to one-third the width of the mirror they’re flanking.
Dimmer switches add flexibility for different times of day and users. Install a LED-compatible dimmer (standard dimmers cause LED flicker). Dimmers let users dial down lighting for a relaxing bath and ramp up for morning grooming.
Smart lighting systems (Lutron Caseta, Philips Hue, etc.) allow control via app or voice assistant and can program schedules or color temperature shifts. Most require a neutral wire at the switch box, older homes may need rewiring.
Budget for fixtures typically runs $75-300 per fixture for quality residential-grade sconces and bars. Expect to pay more for designer finishes, hand-blown glass, or integrated LED fixtures. Installation costs run $100-200 per fixture if hiring an electrician, less if wiring is already in place.
Clearance sales, overstock retailers, and online outlets offer discounts, but verify return policies, lighting is notoriously hard to judge from photos alone. Order samples if possible or buy from retailers with flexible return windows.